If you drive with your dog even once or twice a week, you know the pattern: hair shows up on the seat bottom, gets pressed into fabric, and somehow ends up in seams you can’t reach. Vacuuming alone often feels pointless because hair clings to upholstery fibers and static makes it stick right back.
This guide is written for real life: quick errands, weekend trips, muddy paws, and heavy shedding. You’ll learn the fastest way to remove dog hair from car seats, how to handle cloth vs. leather, and the exact method for hair stuck in seams, stitching, and tight corners, plus a simple routine to keep your car cleaner long-term.
What Google-style “best answer” looks like (so you get results fast)
You don’t need complicated hacks. You need the right order:
- Clump hair first (rubber friction or light damp wipe)
- Lift embedded hair (rubber brush/squeegee tool on cloth)
- Vacuum after hair is loosened (crevice tool for seams)
- Finish (reusable roller for the last visible strands)
That sequence matters because it turns scattered hair into removable piles.
Quick Start: The fastest method (5–10 minutes)
If you only want the quickest approach, do this:
Step 1: Pick up loose hair with a rubber glove (1–2 minutes)
- Put on a rubber/latex glove.
- Swipe your hand across the seat in one direction.
- You’ll see hair roll into clumps.
- If the hair is stubborn, lightly dampen the glove (not wet, just slightly).
Why this works: Rubber creates friction that pulls hair out of fabric and stops it from “floating” around.
Step 2: Use a rubber hair remover tool on fabric seats (2–4 minutes)
For cloth upholstery, a rubber brush or squeegee-style pet hair tool is a game-changer.
- Use short strokes.
- Apply medium pressure.
- Work section by section: seat bottom → backrest → edges.
You’ll feel it when it grabs hair, then you’ll see it gather quickly.
Step 3: Vacuum seams and corners (2–3 minutes)
Now vacuum. Don’t start vacuuming earlier.
- Attach a crevice tool.
- Hit seams, stitching lines, and corners.
- Move the seat forward/back to access hidden gaps.
Step 4: Finish with a reusable roller (30–60 seconds)
Use a reusable roller for the “final look,” so the seat feels clean, not “mostly clean.”
Before you start: check your seat material (this changes everything)
Dog hair behaves differently depending on surfaces.
Cloth seats
- Hair gets embedded in fibers.
- Needs friction + lifting tools.
- Vacuum works best after hair is loosened.
Leather (or leatherette)
- Hair mostly stays on top.
- Needs gentle wiping, not scraping.
- Avoid dragging hard vacuum edges across leather.
If you’re unsure, do a quick test: swipe with a glove, if hair clumps instantly, it’s likely cloth or textured fabric.
Tools you’ll need (choose based on your situation)
You don’t need to buy everything. Pick the smallest kit that solves your problem.
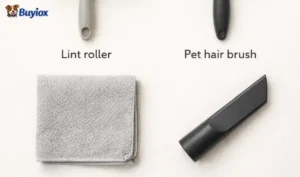
Essentials (most people)
- Rubber glove (or slightly damp microfiber cloth)
- Rubber pet hair remover brush/squeegee
- Vacuum with crevice tool
- Reusable lint roller
Helpful add-ons (for tough cases)
- Soft detailing brush (for seams and stitching)
- Microfiber towels (for leather and quick wipe-downs)
Pro tip: Keep the roller + glove in your trunk. That one habit keeps your car “guest-ready.”
Method 1: How to remove dog hair from cloth car seats (full detailed steps)
This is the most common “why won’t it come off?” scenario. Here’s the reliable method.
Step 1: Dry clump pass (set the seat up to be cleaned)
Goal: Turn scattered hair into piles.
- Start at the top of the backrest.
- Swipe downward in one direction.
- Don’t rub in circles. Circles spread hair and create more static.
- Collect the clumps into a trash bag.
If your dog sheds heavily, do a second pass with a slightly damp glove.
Step 2: “Lift pass” with a rubber tool (remove embedded hair)
Goal: Pull hair out of fibers, not just off the surface.
Work these zones in order:
- Seat bottom center (most pressed-in hair)
- Seat bottom edges (hair builds up near doors)
- Backrest mid-section
- Side bolsters and edges
Use short strokes and pause when you see clumps forming, pick them up as you go, so they don’t redistribute.
Step 3: Vacuum pass (only after loosening)
Goal: Remove what you lifted and what’s hiding.
- Use the crevice tool on seams.
- Use the brush head on open fabric.
- Go slow on the seat bottom. Quick vacuum strokes skip hair.
Step 4: Final tidy pass (roller)
Goal: Clean finish, especially for dark fabric.
A reusable roller catches:
- thin “film” hair
- short strands vacuum misses
- static-clung hair
Method 2: How to remove dog hair from leather car seats (safe approach)
Leather is easier, but you can scratch it if you use the wrong tool.
Step 1: Dry microfiber wipe
- Wipe in long strokes.
- Collect hair into a pile.
Step 2: Slightly damp wipe for stubborn strands
- Lightly damp microfiber (water only).
- Wipe again.
Step 3: Vacuum gaps carefully
- Use a crevice tool, but don’t drag the plastic hard on leather.
- Hover slightly above the leather and focus on cracks/gaps.
Optional: leather care (only if you already do this)
If you already maintain leather, apply your usual leather conditioner after cleaning. Don’t introduce harsh cleaners just for hair removal.
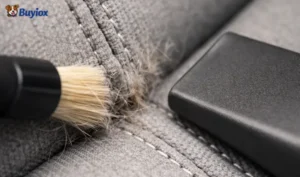
The “hard mode”: hair stuck in seams, stitching, and seat rails
This is where most people get stuck.
Why does the seam trap so much hair
- Hair gets pressed into stitching.
- Vacuum suction can’t grab hair that’s wedged sideways.
- Fabric edges create friction “locks.”
Step-by-step seam removal method
- Loosen first with a soft detailing brush (or soft toothbrush)
- Brush along the seam line, not across it.
- Vacuum immediately with a crevice tool
- Work slowly and keep suction close.
- Repeat once
- If you repeat 3–4 times, you usually start damaging fibers or wasting time.
For seat rails and under-seat edges
- Move the seat forward/back.
- Use the crevice tool under the seat lip.
- Use a flashlight if needed; hair hides there.
Common mistakes that make dog hair removal harder
Avoid these, and you’ll cut cleanup time in half.
Mistake 1: Starting with a vacuum
Vacuuming first often pushes hair deeper into the cloth seats. Always clump/loosen first.
Mistake 2: Rubbing in circles
Circular rubbing spreads hair and increases static. Use one-direction strokes.
Mistake 3: Using harsh scraping tools on leather
Anything abrasive can scratch leather. Use microfiber and gentle suction.
Mistake 4: Skipping seams
Seams hold the most hair. If you skip them, the seat always looks “still dirty.”
Prevention: keep hair off your seats in the first place
If you want your car to stay cleaner between deep cleans, prevention is everything.
Use a seat cover or hammock (best long-term fix)
A good cover:
- protects fabric from hair and dirt
- makes cleanup as easy as shake + wipe
- saves time every week
When to choose what
- Seat cover: best if your dog sits calmly, and you want basic protection
- Hammock: best if your dog moves around or you want extra coverage toward the footwell
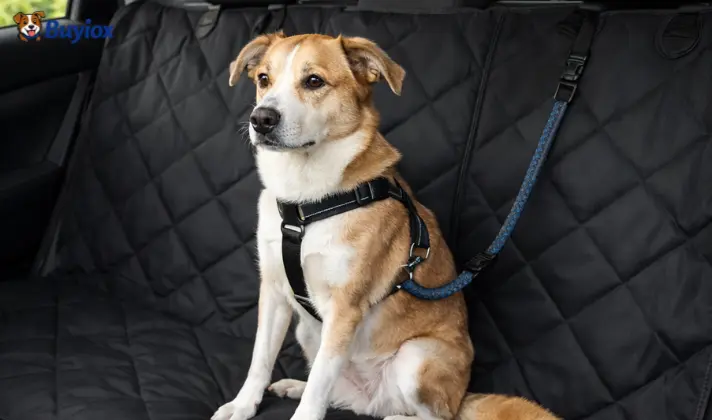
Keep your dog secured (less roaming = less mess)
A harness + seat belt tether helps keep your dog in the back seat area. Less movement means hair stays concentrated in one protected zone.
Build a “2-minute after-ride habit”
Right after a ride:
- glove swipe the worst area (30 seconds)
- Roller the seat (60 seconds)
- quick vacuum seams (30 seconds)
You’ll prevent “hair buildup weeks” where cleaning becomes a big job.
A simple cleaning schedule (so you don’t feel overwhelmed)
Use this if you travel with your dog regularly:
After rides (2–5 minutes)
- quick clump + roller
- seam touch-up if needed
Weekly (10–15 minutes)
- full cloth method (clump → rubber tool → vacuum → roller)
Monthly (optional deep clean)
- under-seat edges + door panels + floor corners
1) What’s the fastest way to remove dog hair from car seats?
The fastest method is a rubber glove swipe → rubber hair tool (for cloth) → vacuum seams → reusable roller. Clumping first saves the most time.
2) Why does dog hair stick so strongly to cloth car seats?
Cloth fibers grab hair, and static makes strands cling. That’s why friction tools (rubber) work better than vacuuming alone.
3) Can I use a lint roller as the only solution?
A roller is great for quick touch-ups, but on cloth seats, it won’t pull out embedded hair. Use a rubber tool first, then the roller last.
4) How do I get hair out of car seat seams?
Loosen hair with a soft brush along the seam, then vacuum with a crevice tool immediately. Vacuuming without loosening usually leaves hair behind.
5) Is it safe to use scraping tools on leather seats?
Avoid scraping on leather. Use microfiber wipes and careful vacuuming around gaps to prevent scratches.
6) What’s the best prevention method for dog hair in cars?
A seat cover or hammock is the most effective prevention. It keeps hair off upholstery and makes cleanup quick after rides.
7) How often should I clean dog hair from car seats?
If your dog rides weekly, do quick touch-ups after rides and a fuller clean weekly. Deep clean monthly if shedding is heavy.